Customizing a Control
Controls can be customized either server-side with a class derived from Control or client-side with a Vue.js component.
You don't need to apply both customizations, in fact, in most cases you have more than enough customization to achieve the desired behavior.
Custom Control Class
To have a custom class, create a new C# class in your project.
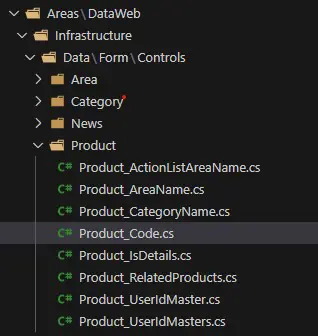
Normally, the file is placed in Areas/DataWeb/Infrastructure/Data/Form/Controls by creating a folder with the name of the item (e.g. Product).
The class name is prefixed with the item name plus "_" plus in the name of the control (for example: Product_Code).
For better code organization, the class can use the [ProjectNamespace] namespace . DataWeb.Data.Controls.
The class can derive directly from Control or more conveniently from a predefined control such as TextBox.
This will further reduce the amount of code you need to write, leaving much of the customization to the default control.
Here's an example of a custom class of a TextBox to validate the uniqueness of a product key.
using System;
using System.Collections.Generic;
using System.Threading.Tasks;
using System.Linq;
using Microsoft.Extensions.DependencyInjection;
using DataWeb.Structure;
using DataWeb.Identity;
using DataWeb.Data;
using DataWeb.Data.Controls;
using DataWeb.Validation;
using DataWeb.WebApp.Infrastructure;
namespace DataWeb.Web.App.DataWeb.Data.Controls
{
public class Product_Code(Form form, IServiceProvider serviceProvider) : TextBox(form, serviceProvider)
{
private readonly ProductStore productRepository = serviceProvider.GetService<ProductStore>();
public override async Task<List<ValidationError>>ValidateAsync(object value, List<Form.ProvidedValue> providedValues, Dictionary<string, object> sectionData, IUser user, string itemId = null, NavigationContext navigationContext = null, CancellationToken cancellationToken = default)
{
var errors = await base.ValidateAsync(value, providedValues, sectionData, user, itemId, navigationContext, cancellationToken);
var products = await productRepository.GetProductsAsync(new ProductStore.Filter { PublishMode = PublishMode.Management }, "en-US");
if (products.Any(x => x.Code.Equals(Convert.ToString(value), StringComparison.OrdinalIgnoreCase) && x.IdMaster != itemId))
{
errors.Add(new ValidationError { Name = "Code", Message = "Code already exists" });
}
return errors;
}
}
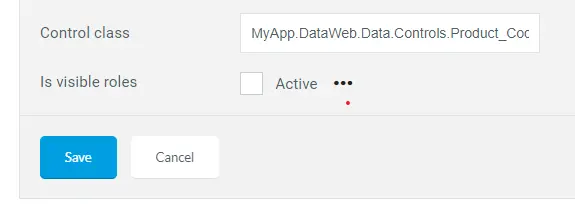
}The last step requires updating the form in DataWeb to signal the control to use this custom class.
The value entered must be the namespace plus "." plus the class name. In this case: MyApp.DataWeb.Data.Controls.Product_Code.
Custom Control Component
To customize the ergonomics of a control, you can create a Vue.js component that will snap to the control when the form is rendered. In this case, the component should be placed in Areas/DataWeb/Scripts/Components/Controls.
The component name is the name of the item plus "_" plus the name of the control.
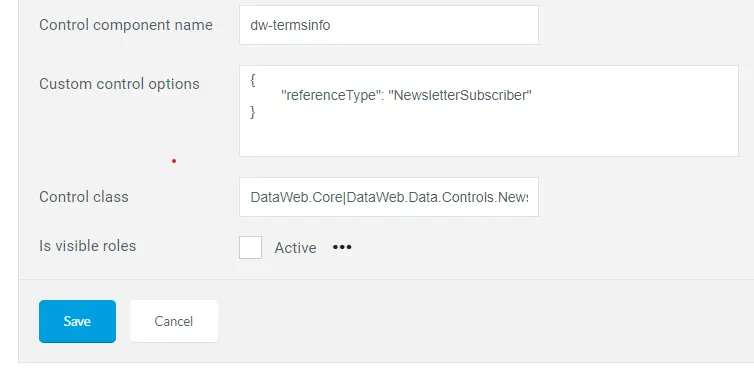
Finally, the component can be associated with the control in the Control component name field where the name of the reference tag must be entered (i.e. not the file name but the associated tag during the configuration of Vue.js). Parameters can also be added to use the same component with different configurations.